How to Clean a Window Air Conditioner without Removing It?

By
Carolina Evans
Carolina Evans
Research Writer
Holds a Master’s degree in Engineering and is keen on her own home’s climate. Sometimes we think that Carolina owns every single product she writes about – that’s ho read more
reviewed
Reviewed By
Richard Powell
Richard Powell
Expert Consultant
For 8 years, Richard had been working as an HVAC specialist and AC unit installer since his student years. Now, he’s our main consultant on every technical aspect that may read more
Last updated: August 10, 2023
HVACLifehack.com is reader-supported. We may earn a commission through products purchased using links on this page. Learn more about our process here

When the summer months roll around, the steamy temperatures can make almost any space uncomfortable. Luckily, window air conditioners are often a cheap and easy solution for quick room cooling. But window air conditioners don’t always work at their peak performance. You may notice that once you install it, it works great, but then its performance seems to diminish as the summer goes on. This is often because your window air conditioner simply needs to be cleaned. But no one wants to take out their window AC once it’s been installed. If you’ve wondered how to clean a window air conditioner without removing it from the window, you’ve come to the right place! With this guide, removing the air conditioner from your window before cleaning it is now a thing of the past. Not only that, but we’ll also give you tips and tricks to keep your AC unit running at it’s best all season long.

Advantages of having a clean AC unit

A dirty air conditioner can bring about a lot of problems, which is why it can be so important to ensure that your air conditioner is as clean as possible. Some of the benefits of having a clean AC window unit can include:How to Clean a Window Air Conditioner without Removing It?

  • Cleaner air: A clean air conditioner actually keeps the air that you breathe cleaner, too. This can lessen problems with allergies, asthma, or other respiratory issues. When your air conditioner is dirty, the air itself is dirty, which can make you sick and be expensive in the long run.
  • Cost savings: The cleaner your air conditioner is kept, the better and more efficient it works. Which means it will cost you less on your utility bills. In fact, one of the signs that your AC may need to be cleaned is a worse performance from your AC and a cost increase on your monthly utility bills.
  • Longer appliance lifespan: AC units use filters in order to catch and collect particles such as allergens, dirt, and dust. Of course, this causes the filters to get clogged and dirty, which forces the machine to strain to work at its best. When an appliance strains, it causes it to not last as long, and can often lead to breakdowns that may need costly repairs. You can avoid all of this by just regularly cleaning the appliance.
  • A cleaner home: When an AC unit is dirty, because it blows air into your space, it also blows any of that accumulated dirt into your home as well, making your home dirtier. It doesn’t matter how often you dust or vacuum, your home won’t get fully clean if you continue to ignore the dirty air conditioner in your window.

Tools that you will need

The good thing about a window air conditioner is that it doesn’t require a professional to clean it. In fact, it’s fairly simple and easy to do it yourself. It can be even easier, too, if you regularly clean it, even daily, instead of just cleaning it once a year. Whatever you decide, though, there are some tools you will need to have at hand in order to make the cleaning process simple and quick:

  • A bucket or nearby sink filled with warm soapy water—tap water is fine! This is what you’ll be using to actually clean much of the unit.
  • A vacuum with a brush attachment. This can especially help to remove any accumulated dust on the air conditioner vents and grills.
  • A hand brush for those small spaces your vacuum tube may not be able to reach.
  • A dry towel or cleaning cloths for scrubbing areas that are dirty or drying spots that have been cleaned.
  • A spray bottle with warm water mixed with a cleaning solution like detergent or bleach. Hydrogen peroxide can work as well.
  • Newspaper to put under the AC and where you’ll be working, or painter’s cloths. This will help keep your space clean and organized.
  • A screwdriver for removing any screws.
  • A small tray to place screws/small parts in. This way, you won’t lose any parts when you’re done cleaning and reassembling.
  • Your air conditioner’s owner manual. If you don’t have it, you can try googling the model number. Most manuals are available for free online.
  • Protective gloves if you’re using bleach. They can also help if any of your AC units has sharper fins or parts.
  • Optional: Can of compressed air. Compressed air can really help remove hard to reach dust and grime, but don’t worry if you don’t have it at hand.

Once you’ve got your cleaning supplies assembled, you’re ready to clean your window air conditioner!


Step-by-step cleaning guide

If you’ve never cleaned your window AC unit, or if it’s been a year or more since you have, or since it was last installed, it’s important to do a deep clean. If you have recently cleaned it, you may only need a lighter cleaning, so feel free to skip these steps to the lighter instructions below. For deep cleaning of your AC, follow these steps:
Deep Cleaning

How to Clean a Window Air Conditioner without Removing It?

  • Disconnect the unit. This step is simple, but absolutely cannot be skipped. Unplug your unit from your outlet.
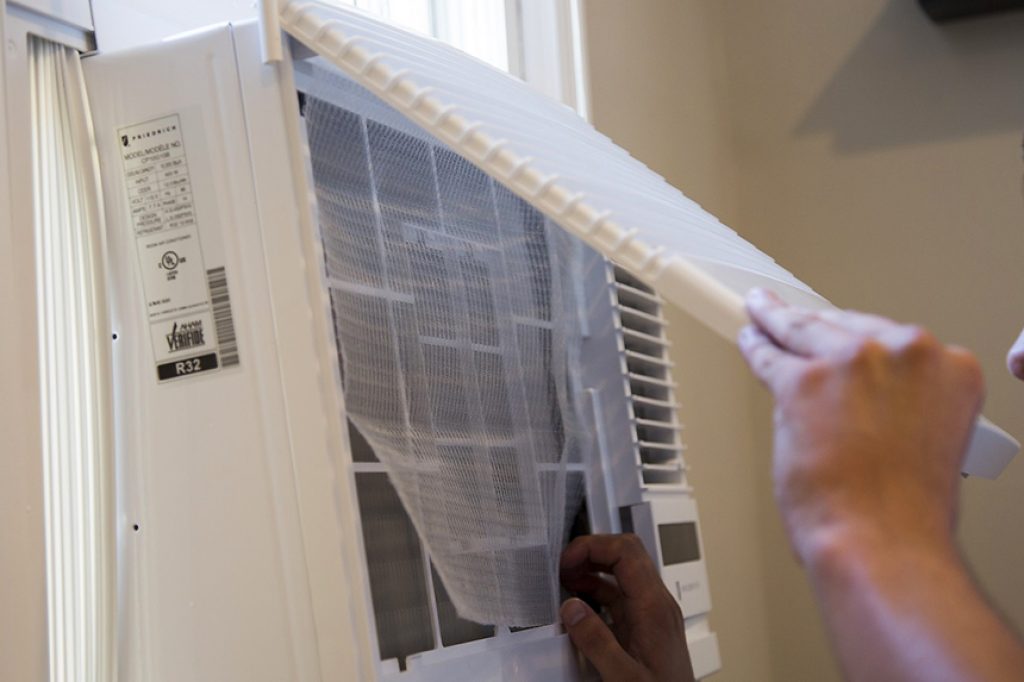
  • Remove the filter. Depending on your model, the filter can be in a variety of places. But it should come out easily. If it’s a reusable filter, clean it. If it’s disposable, throw it away and make sure you have a replacement.
  • Remove the case. Take out the screws and store them in your tray. Take off the front grille and any other components you can easily remove, such as the back grille, condensation drain, and any parts of the framing. Soak all of these in warm soapy water.
  • Vacuum & wipe. Take your vacuum and remove any dirt. Use a damp cloth and wipe any obviously dirty patches. Keep your eyes open for mold growth.
  • Using the spray bottle filled with water mixed with your cleaner of choice, spray the interior surfaces you can reach to wipe down, such as the fins.
  • Clean any exterior portions of the air conditioner by wiping it down and leaving it to dry.
  • Take your soft brush and brush the cooling fins and coils. Make sure not to move these out of place. You can also use your can of compressed air here if you have it, to get at any nooks and crannies.
  • Finally, remove all the soaking pieces and give them a final wipe down and let them dry.
  • Once all the pieces are clean and dry, it’s time to reassemble. Put each piece back together in the order you took it off. If you get confused, consult your manual.

Your air conditioner is now clean and ready to use!

Daily Cleaning

Cleaning your AC unit daily will make your deep cleaning sessions go that much faster.

  • Turn off the air conditioner
  • Spray the intake area gently with a mix of water and hydrogen peroxide. Keep yourself safe from any and all cleaning chemicals!
  • Allow the air conditioner to dry fully before turning it back on.

Monthly cleaning

Besides daily cleaning, regular monthly cleaning can also keep your AC unit working at it’s best.

  • Turn off the unit
  • Remove the front panel of your air conditioner.
  • Dip the towel inside the detergent or soap solution, then clean the filter or run the filter through running water. You can also use hot water to clean the filters and front panel. In case the filter is caked with grime or dirt, consider using a vacuum hose to remove the dirt. If your filter is extremely dirty or damaged, it may be time to replace it.
  • Allow the filter to dry before putting it back.
  • Turn on the unit

A clean window AC unit will keep running for years to come.

Some useful tips

How to Clean a Window Air Conditioner without Removing It?

Now that you’ve cleaned your air conditioner unit, it’s important to follow some best practices to make sure it keeps working at its best and also to ensure that your time wasn’t wasted. Some best tips include:

  • Keep the filter clean! This is the best way to keep your unit from experiencing hard strain and for keeping your air quality clean.
  • Keep the fins straight. During and after any deep cleans, try to keep the cooling fins as straight as you can. They cool the air, and they need to remain straight up and down.
  • Run your AC. The more you use the window air conditioner, the less chance there is for mold to grow. Moisture is what causes mold growth, and if the AC is not being used regularly, this can potentially happen.
  • Keep it in the shade. An air conditioner works best when it’s in the shade and can struggle if it’s dealing with a lot of sun (and heat) baking down on it. When possible, try to mount it on a window that gets the most shade.
  • Store it well. When the summer season has passed, remove it from the window and keep it in a cool, dry space. This will keep it from being damaged or rusting and keep it in good working order for years to come.

If you follow these tips, your air conditioner will thank you with years of faithful service and comfortable cooling when the weather gets its hottest.

Ending

Regular cleaning of your window AC unit will keep it working at its best and will help it provide you with cool air when you need it the most. It’s not difficult to clean your AC, but if it’s neglected, the unit will not work at peak performance, and its lifespan may be reduced.

You should perform a deep clean on your window air conditioner at least once a year. The best time to do this is in spring or early summer before you will start using it. A clean window air conditioner leads to cleaner indoor air, which is beneficial for your health. Now that you know how to clean a window air conditioner without removing it, remember to follow the steps to avoid damaging your unit or injuring yourself.
Leave a comment

Your email address will not be published. Required fields are marked *

X