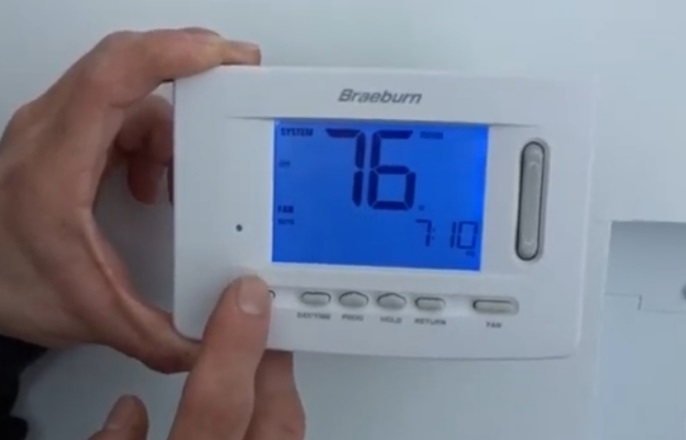

A thermostat is one of the crucial components of your heating and cooling system. This device detects the temperature in your home and automatically regulates it according to your needs.
After setting your thermostat at a particular temperature, you expect your home’s temperature to match that particular setting. However, that may not be the case at times, and you may find yourself wondering why does my thermostat setting not match my home’s temperature.
If you find yourself in such a situation, you’ve come to the right place. This article highlights why your thermostat setting does not match your home’s temperature, how to handle the issues, and how to test and reset it. Read on to understand.
If your thermostat setting does not match your home’s temperature, there must be a problem. In this section, we shall look at what you should do to resolve these issues.
One of the reasons your thermostat settings don’t match your home’s temperature is where you install the thermostat. For example, if you place your thermostat near a room that contains a furnace, it will first detect the room’s temperature and deliver incorrect temperature readings to your HVAC systems. Also, placing your thermostat near a window, in a kitchen, or in a room that receives direct sunlight will have the same effects.
For your thermostat to work properly, place it near a place where it can properly sense the temperature of all the rooms in your home. Consider working with a professional HVAC contractor to help you find the best spot to install your thermostat and relocate it. The best place to install your thermostat is at the center of your home or in the rooms you use regularly.
Your thermostat’s wires may become old and wear out, especially if you’ve used your thermostat for a long time. As a result, your thermostat may send the wrong information to your HVAC system. Faulty wiring may also make your thermostat deliver inaccurate temperature readings to your air conditioner, especially if the device is new.
If you suspect your thermostat is malfunctioning due to wiring issues, open the access panel and check if all wires are connected to the right terminals. When doing this, confirm with the user manual to avoid making mistakes. Also, ensure the connections are tight. Conversely, if the problem is old or worn-out wires, replace them. However, replacing the wires by yourself is not safe. In such instances, it’s advisable to seek the help of a professional electrician or HVAC contractor.
Previously, most homeowners installed mercury thermostats Trusted Source Mercury Thermostat Management CT has a law reqiring manufacturers to take-back mercury thermostats. portal.ct.gov in their homes. Although these thermostats may still serve you, they have their downsides. If the mercury switch tilts, your thermostat will not deliver accurate information. As a result, you have to keep checking your thermostat regularly and tilt it back to the right position.
To return the mercury switch to the correct position, remove the thermostat’s faceplate and locate the glass mercury tube. Use a tiny level to return it to the right position.
All thermostats have a lifespan. After that period elapses, it will stop functioning efficiently. If you’re wondering why your thermostat is not working properly, check when you last replaced your thermostat.
The best way to solve this issue is to buy a new device. When buying a new thermostat, consider getting a programmable thermostat. This device allows you to set a schedule for the day or set the settings for any time of the year to avoid wasting electricity.
You can also consider investing in a smart thermostat. According to most reviews, Nest Smart Learning Thermostat – 3rd Generation – Stainless Steel is the best smart thermostat. Using this device is quite easy since you can control it with a smartphone from wherever you are. Although the new thermostat models are expensive, they’re worth the investment.
Dust particles, smoke, and smudges may settle on your thermostat and block the device’s sensor. When your thermostat’s sensor gets blocked, it may deliver incorrect temperature readings to your air conditioning system.
In such a scenario, it’s important to clean your thermostat. The method you use to clean a thermostat depends on the type. For instance, programmable thermostats have a setting that automatically allows you to clean them. On the other hand, if you have an electromechanical thermostat, you need to open the equipment and clean the internal components.
Here are the steps to follow when cleaning an electromechanical thermostat.
When cleaning your thermostat, avoid touching the internal components with bare hands since the oils in your hands may block the sensor further.
Your thermostat may lose calibrations if the batteries die or if there’s an electrical issue. Additionally, if you have a programmable thermostat Trusted Source Programmable Thermostats | Department of Energy In most situations, a programmable thermostat can save you money without sacrificing comfort. www.energy.gov , it may lose calibrations due to various external factors.
The best way to handle this issue is to recalibrate your thermostat by changing the device’s menu settings or just turning the screws, depending on the model. Recalibrate your thermostat yearly to avoid functional issues.
The air filter is responsible for trapping dust particles from the air that passes through your air conditioner, protecting your equipment from damage.
With time, dust particles may accumulate on your air filters, and it may struggle to maintain the temperature set by the thermostat. In such a scenario, it’s important to change the air filters. For best results, consider buying the Advanced Allergen Reduction HVAC Furnace Air Filter since it has high filtration capabilities.
When you suspect your thermostat has an issue, it’s important to test it. There are two methods you can use to test a thermostat, as discussed below.
If you want to test your thermostat manually, start by turning off the power and pop off the panel using a flathead screwdriver so you can access the wires and terminals. Often, thermostats contain terminals marked G(green), W(white), Y(yellow) R(red). Some thermostats also have an extra terminal marked as C(common). Take a picture of the terminals before unscrewing them so you can easily remember the order or check the user manual.
Unscrew the terminal, remove the wires and ensure they don’t slip back into the holes.
Only unhook the white and red wires if your appliance has more than two wires since these are traditionally heat and power wires, and you can easily remember. Twist the wires’ bare ends and ensure other wires don’t come into contact with them.
After that, switch on your HVAC system. Your thermostat is either defective or improperly wired if the blower turns on, even if you have not connected it to the thermostat.
You can repeat the process by twisting together different wire colors. For instance, you can twist together red and green or red and yellow wires.
If you don’t know much about wiring, consider testing your thermostat with a multimeter Trusted Source Multimeter incidents | WorkSafe.qld.gov.au There have been some serious electrical incidents involving multimeters recently which highlight the risk of using them incorrectly rated or inadequately insulated for the job. www.worksafe.qld.gov.au . The best thing about using this device is that you don’t have to mess with wires or turn off the power. Before you begin, set the meter dial to 24 volts AC. It will automatically read “VAC” or “V” with a squiggly line.
Connect one meter probe to the R terminal and the other to either the G, W, or Y terminal and record the readings. Your reading should range from 22 to 26 volts if the thermostat receives power. If you get a 0, the thermostat needs repair or replacement since it isn’t receiving power.
When your thermostat develops issues, sometimes the best solution would be resetting it. The method you use to reset your thermostat depends on the type. Here’s how to reset different thermostat types.
First, turn off your thermostat and remove the batteries. Often the battery door is located at the back of the device, and you may need to remove it from the wall. Afterward, return the batteries with the negative side facing the positive and leave them that way for five seconds. Then, take them out and place them in the correct position. If the display turns on, you have successfully reset your thermostat.
With a low-voltage electronic thermostat, you will not have a digital display. To reset the thermostat, remove the cover first, then use a soft brush to clean the interior parts. Next, set the thermostat to the lowest temperature and clean the components once more. Turn it back to the highest setting and clean the coil once more. After completing these steps, reset the thermostat to your preferred temperature
Mechanical thermostats don’t have a battery. Therefore, you should manually turn it on and off. Take off the cover, check if everything is fastened, and turn off the thermostat. Next, turn on the breaker after 30 seconds. After that, turn on your thermostat.
Resetting this thermostat type is quite easy. All you need to do is take off the unit face and press the reset button for five seconds. Alternatively, you can remove the batteries for five seconds, and your thermostat will reset itself automatically.
Why does my thermostat setting not match my home’s temperature is a question that most homeowners usually ask. Unfortunately, the answer to this question is not straightforward since there are many causes, as seen in our post above.
Nevertheless, you should not worry too much since you can easily fix these issues, provided you know some information about thermostats. If not, as a professional HVAC contractor to help you identify the exact issue and fix it.
