How to Install Return Air Duct?

By
Carolina Evans
Carolina Evans
Research Writer
Holds a Master’s degree in Engineering and is keen on her own home’s climate. Sometimes we think that Carolina owns every single product she writes about – that’s ho read more
reviewed
Reviewed By
Richard Powell
Richard Powell
Expert Consultant
For 8 years, Richard had been working as an HVAC specialist and AC unit installer since his student years. Now, he’s our main consultant on every technical aspect that may read more
Last updated: August 21, 2023
HVACLifehack.com is reader-supported. We may earn a commission through products purchased using links on this page. Learn more about our process here

Return air ducts are HVAC installations that help balance airflow in the system. However, before seeing how to install return air duct, knowing how it works and its importance in a modern home is important.

Return air ducts bring warmed or cooled air back to the air conditioner or furnace. Installing return air ducts is a critical step that will determine how well your home is cooled by the system. Ensuring that the air flow is efficient, airtight and circular will put less stress on your air conditioning unit, reducing energy bills and cooling the house to a higher degree.

In this article, we’ll see the importance of adding a return air duct, where they are best installed, how to calculate the correct size and how to install it yourself, without necessarily being an HVAC expert.

Why install a return air duct

Without a return air duct, the air in the house will not circulate properly.  The energy saving is also a considerable advantage. To cool or heat the home, you just need to have the device running and not one for each room, as is usually the case with portable AC and heater units. The operation of an air duct system also results in less drafty air circulation Trusted Source Heating, Ventilation and Air-Conditioning Systems, Part of Indoor Air Quality Design Tools for Schools - EPA Unit ventilators and heat pumps have the advantage of reduced floor space requirements and they do not recirculate air between rooms. However, it is more difficult to assure proper maintenance of multiple units over time and they present additional opportunities for moisture problems through the wall penetration and from drain pan and discharge problems. Central air handling units have a number of advantages as compared to unit ventilators and heat pumps serving individual rooms. www.epa.gov , according to the EPA.

The maintenance of this is another factor to take into account. Being a unit for the whole house, it will be much cheaper and faster to carry out. So you we will be saving in this aspect.

Where to install a return air duct

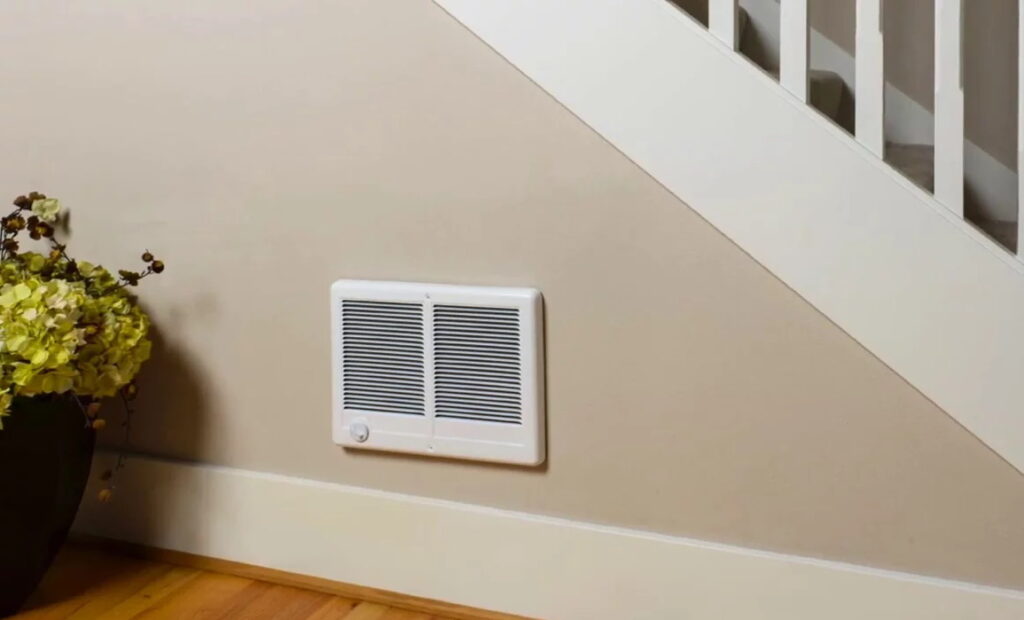
Houses with several rooms benefit the most from the advantages of a centralized system. Return air vents can be installed at ceiling levels. Meanwhile, the return air inlet on the furnace unit can be installed near the floor. It’s also more advisable to install the return air duct near the thermostat. Return air ducts are not recommended for the kitchen or bathroom. A bath fan and heater such as the Delta BreezRadiance RAD80L is better for the bathroom.

How to calculate the correct sizing

Calculating the correct size of the air conditioning duct is a simple but important procedure.

Instructions

  1. Calculate the square footage of the room that the new duct will run into. Measure its width and length. Multiply them together to calculate the square footage. For example, a 10×10 feet (0.92 m2) room is 100 square feet (9.29 m2).
  2. Calculate the amount of air you will need in the room. As a general rule of thumb, you will need 1 cubic foot per minute (0.03 m3) of air for every square foot of space. For example, a 100 square meter (9.29 m2) room requires 100 cubic feet per minute.
  3. Put the cubic feet per minute value into an online duct calculator or use a handheld duct calculator to calculate the size needed for that room. For example, 100 cubic feet per minute requires a 6-inch (15.24 cm) round duct.


Instructions on how to install return air duct in wall or ceiling

  1. Carry out the load calculation. As explained in the previous section, this involves determining the heat gain and loss for each room in the house, and can be done with an online calculator.
  2. Plan where to place the various pieces of the duct system. This consists of finding the most appropriate location for the fan coil unit, followed by the return air duct and filter. The coil unit can be placed in the attic, garage, or alcove, as well as a closet, utility room, or other enclosed space. The return air duct should not be located in the bathroom, most especially. For example, it may draw out humidity from the bathroom into the HVAC system, leading to problems. Installing bathroom heaters is much more effective.

  1. Put on your goggles, gloves, helmet and mask.
  2. Cut holes for the return air duct opening. Pass the fan coil through this opening.
  3. Build a frame to secure the fan coil unit. This can be done by constructing a simple wooden deck to attach the coil unit, or by constructing a suspension deck using 1/4-inch threaded rods. See the instruction manual that came with the fan coil for special instructions for this step.
  4. Attach the ring gasket to the fan coil cabinet. Next, connect the supply ring to the deck, using four screws on the deck opening; it should be 4 inches (10 cm) below the fan coil unit.
  5. Attach the plenum duct to the air conditioning unit. Cut the male end of the first section and insert the duct into the receiving ring over the fan coil to form a tight joint; then flatten the tabs of the sheet metal against the plenum duct unit and insert the flat head pins. Assemble the remaining “lap” duct joints using the steps above. Place plenum end plug over top extension; This is done by collecting the tabs from the sheet metal at the end of the plug with flat head pins. Tape here with a cross section.
  6. Cut a 2-inch (5-cm) hole in the plenum at a 20-degree angle, facing downward. Join the plenum intake gaskets around this hole; place the plenum socket connector in this hole. Insert the plenum closures with the pliers.
  7. Attach the air return box to the opening cut out above. Using the four screws, attach the frame to the long side of the box. Next, insert the air return grille into the box with the four screws provided for this purpose. Insert the filter into the grill.
  8. Cut the return air ducts following the instructions in Step 7. Connect one end of the return ducts to the elliptical end of the fan coil and the other end to the air return box connectors with the band clamps.
  9. Test the duct installation for correctness by starting the air conditioning system and checking the ducts for leaks and the desired air pressure and temperature levels. Check with your state government website for the required testing procedures and make sure your system passes them successfully

Final thoughts

How to Install Return Air Duct?

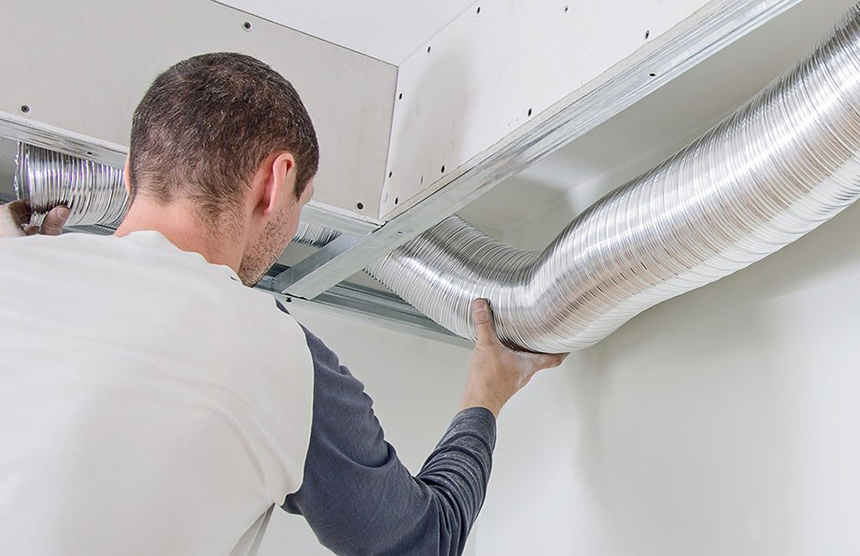
Installing the correct duct is essential for an efficient HVAC system. A return air duct installation helps you maintain air pressure, good air quality and filtering, while saving on energy bill. We’ve seen how to install return air duct. However, the first steps involve calculating the correct sizing. Those that are too large will have too low air velocity inside. This will cause the air to spend too much time inside the duct, significantly altering the set temperature. Those that are too small have a velocity that is too high, which will lead to increased static pressure and noisy air vents. If the static pressure is too high, the airflow is drastically reduced.

References

1.
Heating, Ventilation and Air-Conditioning Systems, Part of Indoor Air Quality Design Tools for Schools - EPA
Unit ventilators and heat pumps have the advantage of reduced floor space requirements and they do not recirculate air between rooms. However, it is more difficult to assure proper maintenance of multiple units over time and they present additional opportunities for moisture problems through the wall penetration and from drain pan and discharge problems. Central air handling units have a number of advantages as compared to unit ventilators and heat pumps serving individual rooms.
Leave a comment

Your email address will not be published. Required fields are marked *

X